For the longest time, every single drawer in our home had the same problem — you’d open it and things would just be sitting there, randomly. No system. No order. Just stuff.
And it wasn’t just the drawers. The top of every wardrobe had random items piled on it — a shawl here, a toolkit there, someone’s old phone charger next to a bottle of mustard oil. The kitchen was its own story: spices, plates, and random utensils all sharing the same cabinet like they had nowhere else to go.
What really bothered me wasn’t even the mess itself. It was the fact that nothing had an identity.
Every cabinet, every drawer, every shelf — they were just storage. Not specific storage. If you needed something, you had to open three drawers before you found it. And even then you weren’t sure.
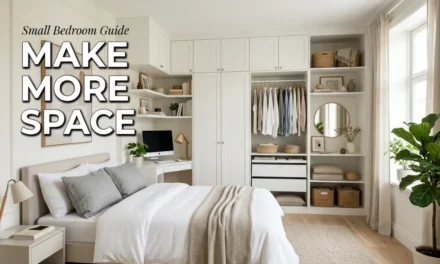
We live in a 1000 square feet house with 12 family members. Adding new furniture or storage racks isn’t really an option — there’s no wall left to put anything against. So the solution had to come from what we already had.
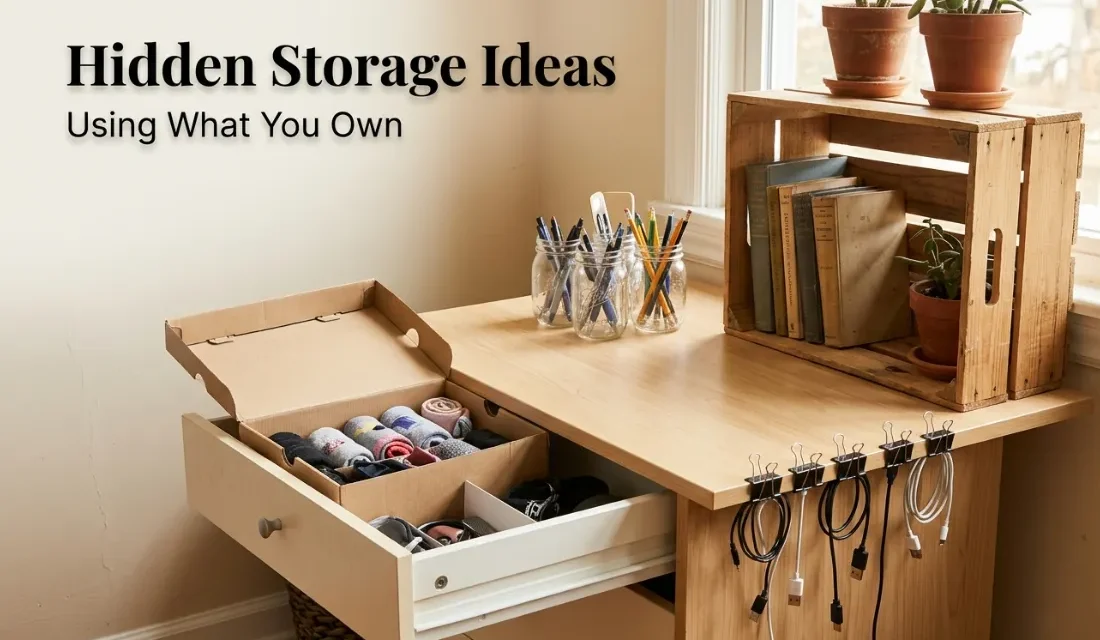
That’s exactly what this article is about. 10 storage solutions using items you already own — no shopping, no spending, just giving the stuff you already have a proper purpose and a proper place.
Why Clutter Feels So Heavy (Even When You’re Used to It)
Before we get into the hacks, let’s be honest about something.
A messy, unorganized home doesn’t just look bad — it feels heavy. When you wake up and the first thing you see is a cluttered surface, it affects your mood before your day even starts. When you spend 10 minutes looking for the cumin seeds that are definitely in the kitchen somewhere, that small frustration adds up.
Organization isn’t about being neat for the sake of it. It’s about saving time, saving mental energy, and making your home feel like it’s working with you — not against you.
And the good news? You don’t need to spend anything to get there.
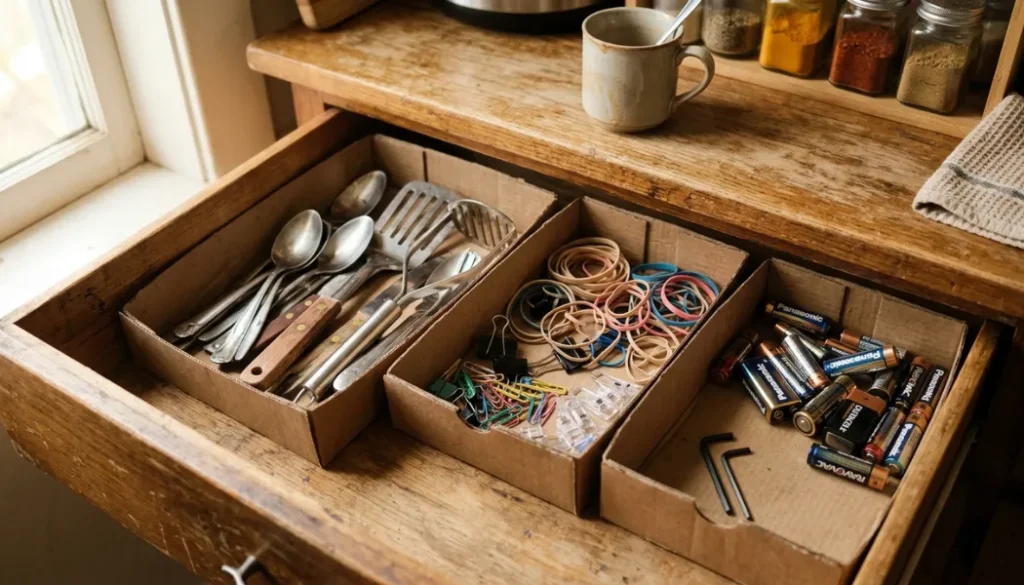
1. Shoe Boxes → Drawer Dividers
This was the first thing I actually tried, and honestly, it made the biggest visible difference fastest.
Shoe boxes — or even just their lids — fit perfectly inside most drawers and instantly create sections. No more “everything just in one pile.” Each section gets one category. Utensils in one, rubber bands and clips in another, batteries in the third. That’s it.
The key insight here is simple: the drawer doesn’t need new content, it needs walls. Shoe box lids are walls.
How to do it:
- Collect 3–5 shoe box lids (the flat, shallow ones work best for kitchen drawers)
- Measure your drawer’s inner width and depth
- Trim the lids with scissors to fit snugly side by side
- Optional: wrap them in plain paper or contact paper for a cleaner look
- Place them in and assign one category per section
Pro Tip: If you have mismatched box sizes, that’s fine. The sections don’t need to be equal — match the box size to what you’re storing. A wider section for spoons, a narrow one for chopsticks or skewers.
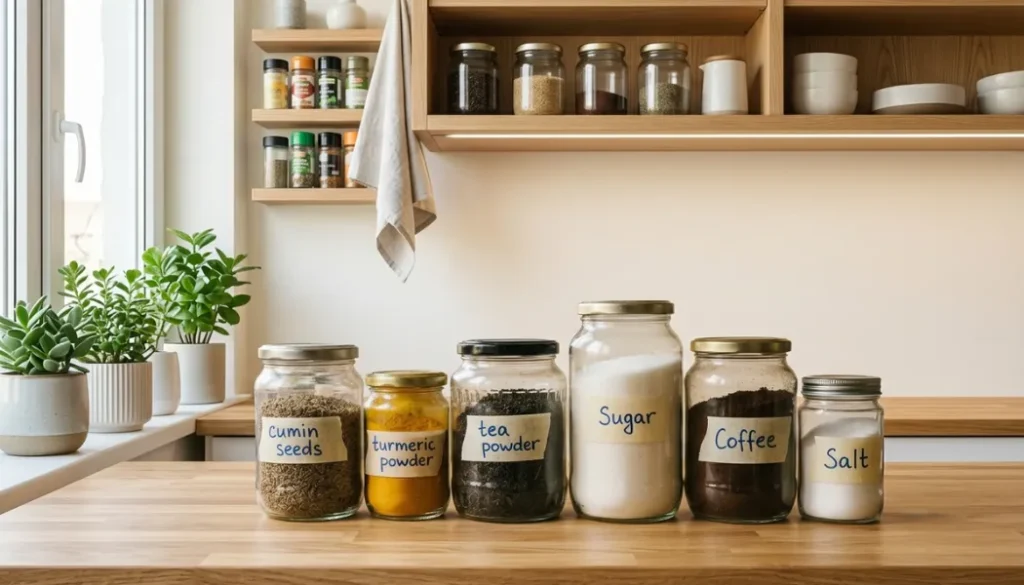
2. Glass Jars → Labeled Kitchen Storage
After the drawer dividers, the kitchen was next on my list.
We had spices, tea, coffee powder and sugar all in different containers — some plastic bags, some half-open boxes, some loose in a cabinet. Finding the right one meant moving everything else.
The fix was embarrassingly simple. We had plenty of old jam jars and pickle jars already washed and sitting in a cabinet. I cleaned them properly, let them dry, wrote a label on each one with a marker and a strip of tape, and moved every dry ingredient into its own jar.
Cumin powder in one. Turmeric powder in one. Tea powder in one. Sugar in one. Coffee in one.
Now they all live on one shelf, all visible, all labeled. You grab what you need and put it back. Done.
How to set it up:
- Wash glass jars thoroughly and soak in warm water for 30 minutes to remove sticky labels
- Dry completely before filling — moisture ruins dry ingredients
- Use masking tape and a permanent marker for quick labels, or print small labels if you want it to look neater
- Assign one ingredient per jar — no mixing
- Line them up in order of most-used to least-used
Works for: Spices, dry pulses, tea/coffee, rice, sugar, baking soda, flour for small batches, cotton balls in the bathroom, pens on a desk
Pro Tip: If you want all jars to look uniform, don’t mix glass sizes dramatically. Three similar-height jars on a shelf look intentional. Eight different heights look like a collection of random jars. Group by similar heights on the same shelf.
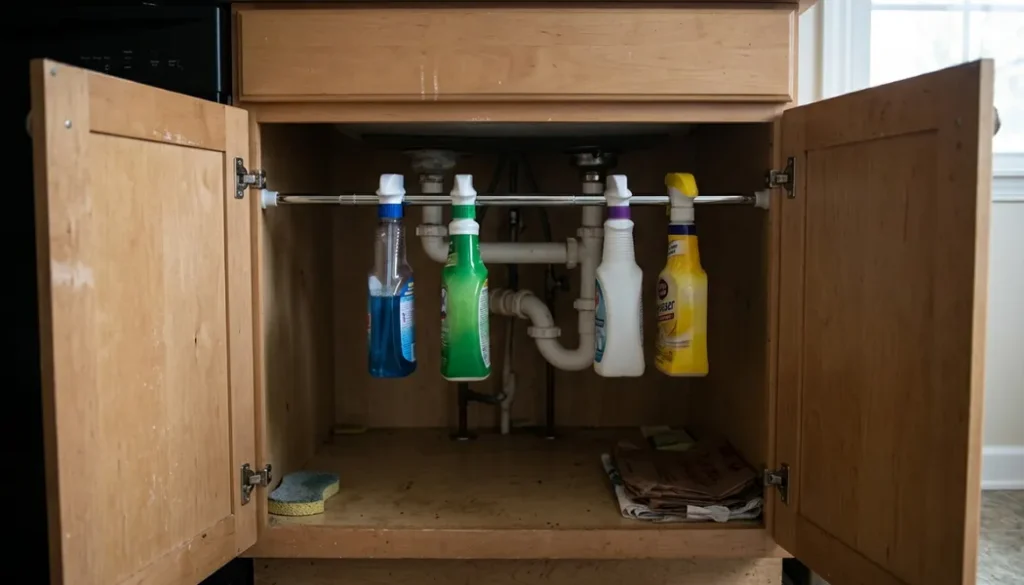
3. Tension Rod Under the Kitchen Sink → Spray Bottle Organizer
The space under the kitchen sink is a black hole in almost every home. Things go in, things don’t come out, and eventually you’re not even sure what’s in there.
One tension rod (the kind used for curtains or shower curtains) completely solves the spray bottle problem. Install it horizontally across the cabinet, about 8–10 inches from the top. Hang your spray bottles by their trigger handles. Everything is now visible, accessible, and off the floor — which frees the bottom half of the cabinet for sponges, scrubbers, and extra bags.
How to install (no drilling needed):
- Measure the inner width of the cabinet
- Adjust the tension rod to fit tightly (it expands and grips the walls — no hardware required)
- Hang spray bottles by their nozzle triggers
- Use the freed floor space for a small bin or basket
Pro Tip: While you’re at it, take everything out first. You’ll almost certainly find bottles that are empty or nearly empty. Clear those out and you’ll have even more space than you expected.
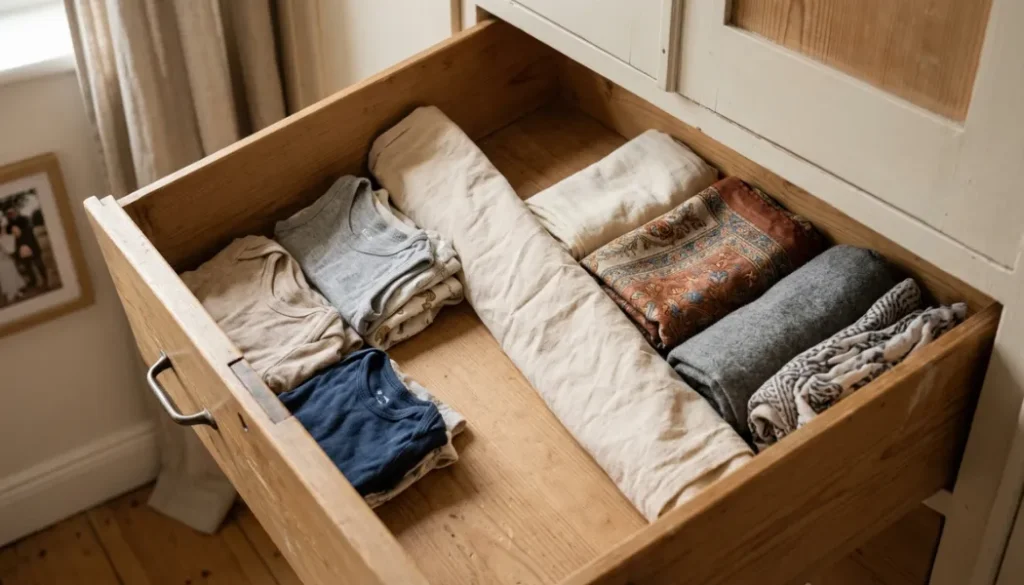
4. An Old Shawl or Fabric Scrap → Drawer Liner and Separator
In a large family home, fabric scraps are never in short supply. Old long scarf, torn bedsheets, leftover curtain fabric — fold any of these and place them inside drawers to create soft, non-slip liners.
For separating items in a deeper drawer, fold a thick fabric strip lengthwise and lay it across the width of the drawer like a divider wall. Works especially well in bedroom drawers with folded clothes — the fabric strip keeps one “section” from sliding into another when the drawer opens and closes.
Best uses:
- Wardrobe drawers: separate folded tops, bottoms, and long scarf into sections
- Kitchen drawers: soft liner prevents utensils from scratching the wood
- Bathroom cabinet: keep rolled towels in a specific section without them unrolling
Pro Tip: Use darker fabric for kitchen drawers — lighter fabric shows stains quickly in a kitchen environment.
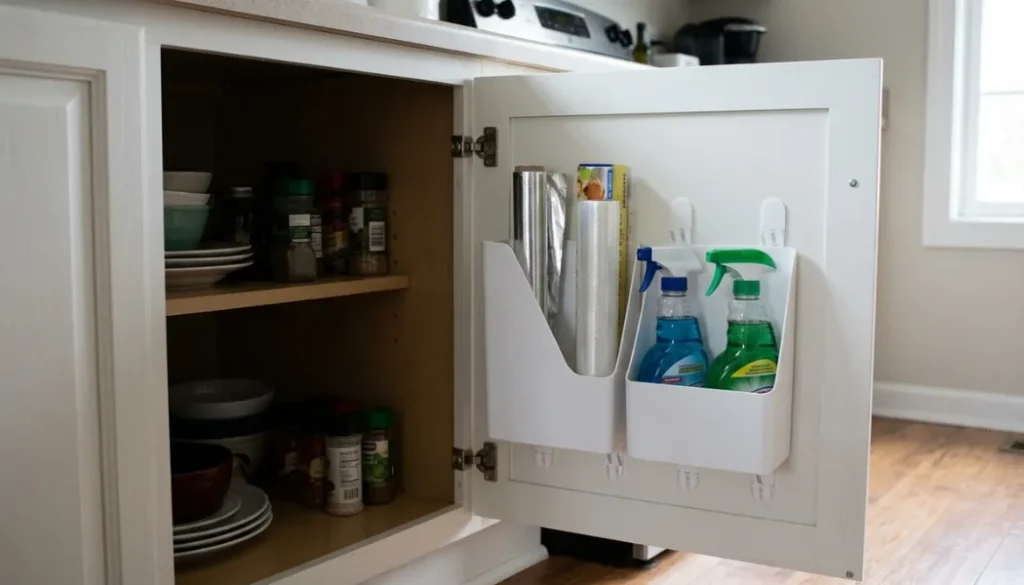
5. Magazine Holders → Inside Cabinet Door Organizer
This one looks strange until you see it working — and then you can’t unsee it.
Take old cardboard or plastic magazine holders (file holders also work) and mount them on the inside of a cabinet door using adhesive strips. Now the inside of that door, which was empty and wasted, becomes storage space.
In the kitchen: store aluminum foil rolls, cling wrap, and extra plastic bags. In a bathroom cabinet: store hair tools, small bottles, or extra soap bars. In a pantry: store spice packets that don’t fit in jars.
How to mount:
- Use 3M Command Strips (renter-friendly, no wall damage) — two strips per holder
- Position the holder at a height that makes sense for what you’re storing
- Test the weight before fully loading — most Command Strips handle 2–3 kg comfortably
6. Old Ladder → Blanket or Shawl Rack
If there’s an old wooden ladder stored in a storeroom or garage, bring it inside.
Lean it against a bedroom wall and drape extra blankets, seasonal shawls, or spare towels over the rungs. It looks deliberate, it keeps those items off the floor and out of an already crowded cabinet, and it costs nothing.
In a large family home, spare blankets are always an issue — they take up space in wardrobes that’s needed for clothes. A ladder against the wall solves this without adding a new furniture piece.
How to style it:
- Wipe down or sand rough edges
- Lean at a slight angle against the wall for stability
- Fold blankets in thirds before draping — they look cleaner that way
- Use lower rungs for everyday items, upper rungs for less-used seasonal things
Pro Tip: The more worn and natural the ladder looks, the better. You don’t need to paint it or fix it up — rough wood grain has a warm, authentic look that actually works well in a bedroom corner.
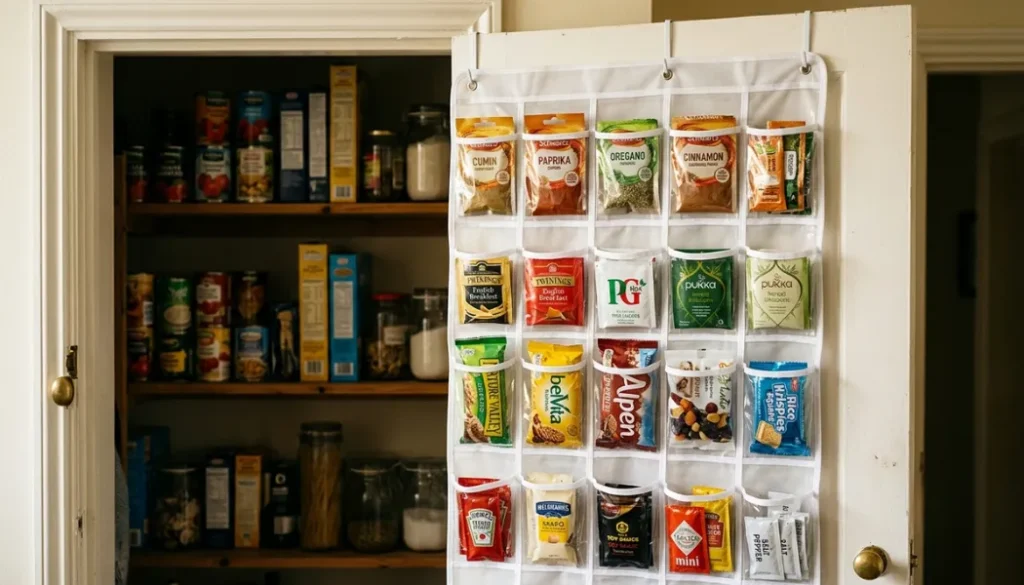
7. Over-Door Shoe Organizer → Pantry or Wardrobe Hack
If you have an over-door pocket organizer anywhere in your home, move it to where it’s most needed — a pantry door or a bedroom wardrobe door.
Each clear pocket becomes a mini storage slot. In the kitchen: one row for tea/coffee packets, one for spice refill pouches, one for snack items. In the wardrobe: one row for Shawl or Scarf folded into thirds, one for small accessories, one for belts.
The biggest advantage in a crowded home is vertical space. This organizer uses the back of a door — space that’s usually completely wasted — without taking floor space or shelf space.
Best placement in a large family home:
- Back of the main pantry door — dry snacks and pouch spices
- Back of bathroom door — small toiletries, extra soap, hair ties
- Inside wardrobe door — accessories, small folded items, seasonal pieces
8. Egg Cartons → Jewelry and Small Items Tray
A cardboard egg carton, placed flat inside a vanity or dressing table drawer, becomes a 12-compartment organizer instantly.
Each cup is perfectly sized for earrings, rings, hair clips, safety pins, and small buttons. In a house with multiple women sharing a space, this small fix prevents the “where did my earring go” situation that happens daily.
Best uses:
- One earring per cup — pairs stay together
- Hair clips, bobby pins, and pins sorted by type
- Small buttons and safety pins in a sewing drawer
- Spare screws, nails, and small hardware in a toolbox
Pro Tip: Use two egg cartons side by side in a wider drawer if you have a larger collection. The cardboard is easy to cut and fit exactly to your drawer size.

9. Wooden Crates or Old Fruit Boxes → Stackable Room Storage
Old wooden crates — the kind that come with fruit, or that families often have stored somewhere — are genuinely versatile storage pieces.
Stack two on their sides against a bedroom wall as a low shelf unit. Use them flat under a bed as shallow pull-out storage for extra bedding. Mount one on a wall as open display shelving. In a crowded 5 marla home, vertical stacking matters — two crates stacked take the same floor space as one but give double the storage.
How to prepare crates:
- Sand rough edges and splinters — important in a home with children
- Optional: paint or leave raw, both look fine
- Line with newspaper or old fabric if items could fall through the gaps
- If using under a bed, attach small furniture sliders underneath so they pull in and out easily

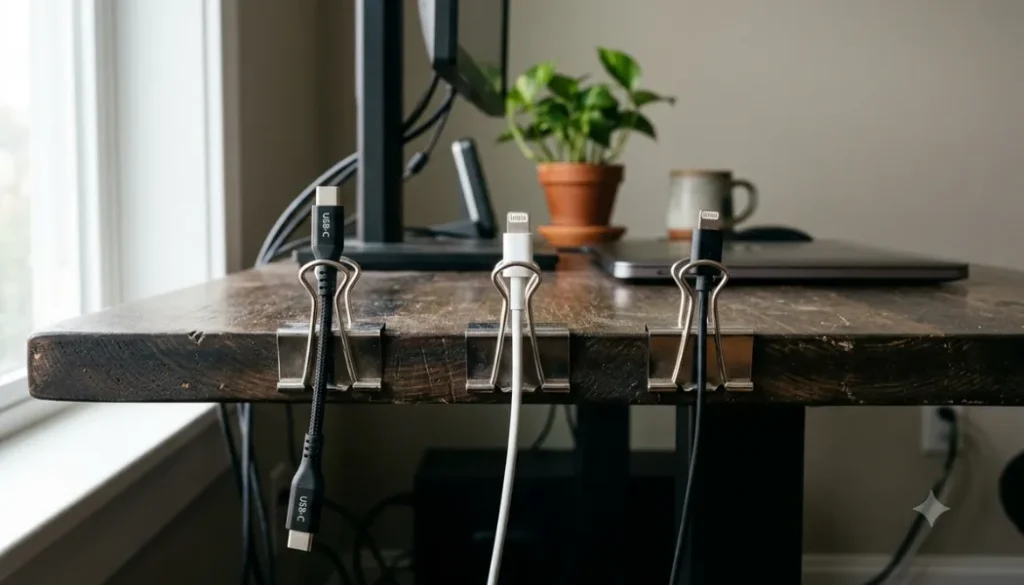
10. Binder Clips → Cable and Cord Management
This is the simplest one on the list and it takes five minutes, but if you have a desk or a charging area, it changes daily life noticeably.
Clip large binder clips along the back edge of a desk or table. Thread each cable through the metal loop at the top of the clip. Now every charging cable, every headphone wire — each one stays at desk level, labeled, separate, and never falls behind the furniture.
In a home where multiple family members charge phones and use devices in the same area, this one small setup prevents the daily “whose charger is this” confusion.
How to set it up:
- Attach 3–5 large binder clips along the back edge of the surface
- Write a small label on each clip with a marker — “phone,” “laptop,” etc.
- Thread the cable through the loop — pull out when needed, drop back when done
The Real Problem Isn’t the Clutter — It’s the Lack of Identity
Here’s the thing I realized after going through all of this: the mess in our home wasn’t because we had too many things. It was because nothing had a defined place.
Every drawer was “general storage.” Every shelf was “put things here.” Without a specific identity for each space, everything just ended up everywhere.
Once you give each almari, each drawer, each shelf a single clear category — this one is for masalay, this one is for medicines, this one is for documents — things start going back where they belong automatically. Because now there’s a logical right answer.
You don’t need new storage. You need clearer categories for the storage you already have.
The Best Time to Do This
Pick one day off — a Sunday, or any free afternoon — and give it two to three hours. Not the whole house at once. Pick one room. Or even just one kitchen cabinet.
Take everything out. Decide what category this space should be for. Use whatever containers you have to create divisions. Label them. Put things back in categories only.
You’ll spend no money. You’ll save the time you currently waste looking for things. And that background noise of “this house is a mess” that sits in the back of your mind? It gets quieter.
It’s worth the afternoon.
Frequently Asked Questions
Q: Can these solutions work in a small house with a large family? Yes — most of these are specifically useful in compact, high-occupancy homes. Solutions like glass jar labeling, drawer dividers, and the over-door organizer work better in busy homes because everyone knows exactly where things go and can put them back correctly.
Q: Do these need any tools or drilling? Most of them need nothing at all. The tension rod requires no drilling. Command strips for the magazine holder need no tools. The binder clips require nothing. The only one that might need screws is if you choose to mount wooden crates on a wall — but even that can be done with basic hardware.
Q: What if my family doesn’t follow the system? Start with the spaces only you control — your own drawer, your desk area, your section of the wardrobe. When others see it working, they’re more likely to try it themselves. Don’t try to reorganize shared spaces first.
Q: How long does it take to see a real difference? One focused afternoon on one room will give you a visible, usable result the same day. The full effect — not spending time looking for things, not feeling that low-level background stress of clutter — you’ll notice within a week.
Final Thoughts
The best storage solutions are the ones that cost nothing and use what you already have. Shoe box lids in a drawer. Glass jars on a kitchen shelf. A tension rod under the sink. An old ladder in the corner.
None of this requires a shopping trip. None of it requires a big investment of time or money. It just requires one focused afternoon, a willingness to look at what you already own with fresh eyes, and the decision to give every space a clear, single identity.
Start with one drawer. One cabinet. One shelf. You’ll see the difference by the end of the day.
Which of these 10 will you try first? Leave a comment below — and if you take a before/after photo, share it. There’s nothing more motivating than seeing a real result.